
Auto-ISO is perfect for days where the sun is periodically behind the clouds
The one drawback to this was that now you have a third setting to mess with when setting your exposures, the first two being shutter speed and aperture of course. This can take up a bit of extra time when shooting in an environment where the light is changing very rapidly from extremely bright to extremely dark. I photograph a lot of live music and the time it takes to adjust the settings can cause me to lose a shot.
Of course I can just set the ISO to 1600 or 3200 and just shoot as normal, but I don't always need to shoot at that high of an ISO. Sometimes the light is bright enough where I can use an ISO setting of 400. Why get stuck with every image suffering from high ISO noise if you don't have to?
A lot of professional photographers look down upon anything labeled as "Auto" dismissing it as a gimmick for amateurs to use, but the truth is Auto-ISO is a great tool to use to get the most out of your camera and to make a greater number of your images usable. Being that you, the photographer, sets the parameters of the Auto-ISO sensitivity settings it's not just another "dumb" auto setting. You tell the camera what to do and it helps out by automatically changing the ISO when certain conditions are met.
The key to controlling the Auto-ISO feature lies in the Shooting Menu under ISO sensitivity settings. This is where you plug in the parameters that control how the ISO setting is changed and how high the settings go.
ISO Sensitivity auto control
The first option is On or Off. This is pretty self-explanatory. I don't keep Auto-ISO on at all times. If I'm out shooting in the daytime or indoors with nice consistent light or if I'm using a Speedlight or some sort of external lighting setup, I'll set the ISO manually. This gives you even, predictable results.
A couple of tips I'll offer here is to add ISO Sensitivity control to your My Menu. Although you can't change the other settings you can use the My Menu setting to access it quickly to turn it on or off. If you want really quick access to this you can set it to the top item in My Menu and you can go into the CSM and set the Preview or Fn. button to Access top item in My Menu. This allows you to access the ISO Sensitivity auto control with the simple press of a button.
Maximum sensitivity
The second setting is Maximum sensitivity. This is where you decide how high the ISO setting can go. This is set in full one stop increments. My maximum sensitivity setting depends on what camera I'm using at the time and how well it does at high ISO settings. This is a matter of personal preference which depends on how much noise you're willing to live with. Some examples of my maximum ISO settings are below.
- D3s - 6400
- D3x / D300 / D300s / D5000 - 1600
- D700 / D90 - 3200
- All other Nikon camera bodies - 800
Minimum shutter speed
The minimum shutter speed setting is the shutter speed at which the camera ups the ISO setting when it falls below the parameters. For example, if you set the minimum shutter speed of 1/80 the camera will up the ISO to hold that shutter speed. This however, is not the absolute lowest shutter speed that the camera will choose. The camera will attempt to keep the shutter at the minimum setting, but if the light levels fall below what is needed and the camera is maxed out at the ISO a slower shutter speed will be chosen. Conversely, in bright light the shutter speed with be faster.
When choosing the minimum shutter speed I take a couple of things into consideration; the lens focal length and the action. You're probably familiar with the reciprocal rule of focal length which in a nutshell says that to handhold a shot without blur you're shutter speed needs to be at least the reciprocal of the focal length setting of the lens. For example using a 28mm lens you can safely handhold at 1/30 while using a 200mm lens requires a shutter speed of at least 1/250 to ensure a nice sharp shot.
I generally use two lenses when shooting an event, a 28-70mm and an 80-200mm. I set the the minimum shutter speed to 1/80 for the 28-70mm and 1/320 for the 80-200mm (I choose 1/320 just to be safe). As I said before I also take in account the action. If there's a lot of fast movement I will chose a faster minimum shutter speed to freeze the action. If there's plenty of light I'll often select a higher shutter speed just as an added measure.
I don't normally set the minimum shutter speed slower than 1/60 eve when using an ultra-wide lens like the 14-24mm, just for the simple fact that even slight subject movement will cause motion blur when shooting at shutter speeds slower than 1/30.
Keep in mind that the minimum shutter speed settings are only taken in account when shooting in Aperture Priority or Programmed Auto mode.
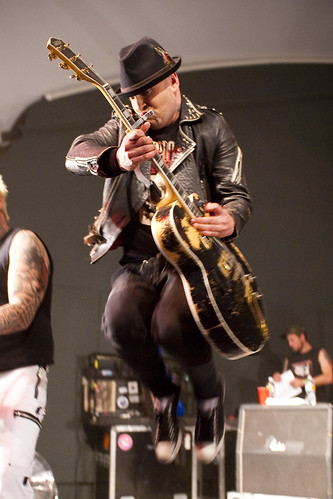
Fast action requires a faster shutter speed, even 1/100 wasn't fast enough to freeze the action in this shot
The bottom line is that Auto-ISO is a real time saver and allows you to get the most detail from your images especially in a situation where the light is changing quickly.
Don't forget to add me on facebook. Click on the facebook badge in the top right corner!
No comments:
Post a Comment